API Flange Pressure Test Procedure: A Complete Guide
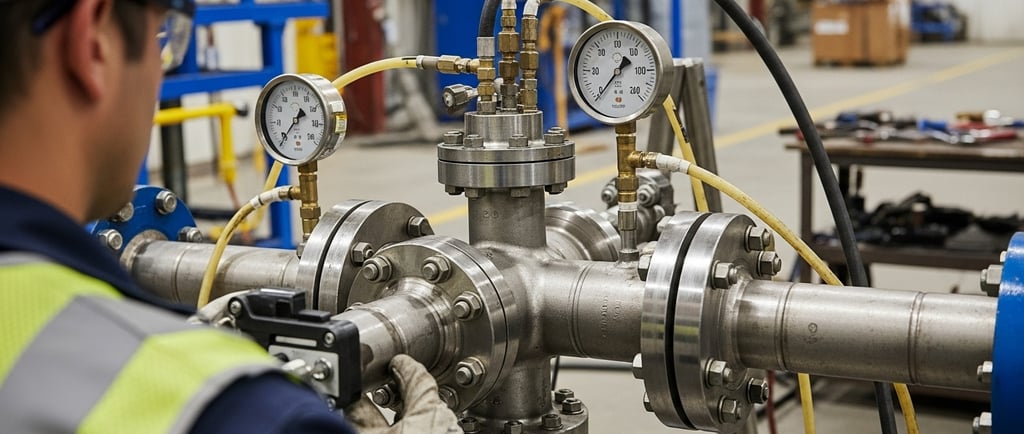
Pressure testing API flanges is critical for ensuring system safety and integrity. This procedure verifies that flanges and their connections can withstand operating pressures without leaking or failing. Proper testing follows established industry standards and requires careful planning.
11/6/20253 min read
You might be wondering why this process is so important. The answer is simple: it prevents dangerous failures in service. A properly conducted pressure test identifies potential problems before they become emergencies.
Understanding API Pressure Test Requirements
API standards specify rigorous testing protocols for flanges used in oil and gas applications. These tests confirm that flanges meet their rated pressure capacity and maintain seal integrity under operating conditions.
The most common test is hydrostatic testing, which uses water to apply pressure. This method is safer than pneumatic testing because water compresses very little, reducing the risk of explosive energy release if a failure occurs.
Pre-Test Preparation Steps
1. Review Design Specifications
Check the flange’s pressure rating and test requirements. Verify the API flange class and material specifications. Ensure you understand the required test pressure, which is typically 1.5 times the design pressure for hydrostatic tests.
2. Assemble Safety Equipment
Install pressure gauges calibrated within the last six months. Place relief valves set to 10% above test pressure. Use physical barriers to protect personnel. Ensure all participants wear appropriate personal protective equipment.
3. Prepare the Test System
Isolate the section being tested with blinds or spectacle plates. Remove or isolate components that could be damaged by test pressure. Vent all air from the system through high-point vents. This prevents air pockets that could affect test accuracy.
Hydrostatic Pressure Test Procedure
Step 1: Fill the System
Fill the isolated section slowly with clean water. Maintain vent valves open until water flows out consistently without air bubbles. This ensures complete filling and eliminates compressible air.
Step 2: Apply Initial Pressure
Gradually increase pressure to 50% of the test pressure. Hold for 10 minutes and visually inspect all connections. Look for obvious leaks or deformations. If issues appear, depressurize immediately for repairs.
Step 3: Reach Test Pressure
Increase pressure slowly to the full test value. The pressure rise rate shouldn’t exceed 125 psi per minute. Maintain test pressure for the specified hold time, typically 1-2 hours for API flanges.
Step 4: Conduct the Hold Period
During the hold period, check pressure gauge stability. Walk the entire test section inspecting each API flange connection. Look for weeping, leakage, or visible distortion. Document all findings.
Acceptance Criteria and Documentation
A test is successful when:
Pressure remains stable during the hold period
No visible leakage occurs at any connection
Flanges show no signs of permanent deformation
All gaskets maintain seal integrity
You must maintain complete test documentation. Records should include test pressure, duration, environmental conditions, and inspector observations. This documentation proves compliance and provides baseline data for future tests.
Safety Considerations
Pressure testing involves significant hazards. Always follow these safety rules:
Never exceed the calculated test pressure
Stay outside barricaded areas during pressurization
Use communication systems to coordinate the test
Have an emergency depressurization plan ready
Never make adjustments to pressurized equipment
Common Pressure Testing Questions
What pressure should I test API flanges?
Most codes require testing at 1.5 times the design pressure. Check the specific API standard for your flange class. The test pressure must account for temperature effects if testing differs from operating conditions.
How long should I hold test pressure?
Standard hold time is one hour for most applications. Some specifications require two hours for critical service. The duration should be sufficient to conduct a thorough inspection of all components.
What if I find a small leak during testing?
Depressurize completely before addressing any leaks. Never attempt repairs under pressure. Replace gaskets or tighten bolts only after reaching zero pressure. Then repeat the entire test procedure.
Can I use pneumatic testing instead of hydrostatic?
Pneumatic testing is generally avoided due to safety risks. If necessary, it requires additional safety measures and typically uses only 1.1 times design pressure. Hydrostatic testing remains the preferred method.
How often should API flanges be pressure tested?
New installations require testing before commissioning. Existing systems typically need retesting after modifications or at intervals specified by risk-based inspection programs. Some jurisdictions mandate regular testing.
What documentation is required?
Complete test records must include date, inspector name, test pressure, hold time, and results. Photograph the test setup and any issues found. This documentation provides legal protection and maintenance history.
Ensure Your Flanges Meet API Standards
Proper pressure testing is not optional it’s essential for safe operation. Following established procedures protects personnel, equipment, and the environment. While this guide outlines general practices, always consult the latest API standards and your company’s specific requirements.
At apiflange.com, we understand that proper testing begins with quality components. Our API flanges meet all specification requirements, providing reliable performance under test conditions and in service. We provide technical support to help customers implement proper testing protocols.
Need API flanges that will pass pressure testing every time? Contact us for certified products and technical assistance with your testing procedures.
Contact
Email: sales@texasflange.com
Phone: 281-484-8325
Address: P.O. Box 2889 Pearland, TX 77588
© 2025. All rights reserved.